Setup
Get started by following below steps:
Prerequisites
- Kubernetes Cluster: You should have a running Kubernetes cluster with at least Kubernetes 1.33. You can use any cloud-based or on-premises Kubernetes distribution.
- kubectl: Installed and configured to interact with your Kubernetes cluster.
- Helm: Installed for managing Kubernetes applications.
- Postgresql: We require a postgresql database, you can pass your own, or enable it in CruiseKube helm chart, for CruiseKube-managed postgresql.
- Prometheus: You should have a prometheus installed in your cluster.
Installing Prometheus
We can setup a Prometheus instance if not already present.
Please note, if a instance is already installed, new installation might fail. You can pass the existing Prometheus instance when installing CruiseKube.
helm repo add prometheus-community https://prometheus-community.github.io/helm-charts
helm repo update
helm install kube-prometheus-stack prometheus-community/kube-prometheus-stack \
  --namespace monitoring \
  --create-namespace \
  --set alertmanager.enabled=false \
  --set grafana.enabled=false \
  --set prometheus.prometheusSpec.serviceMonitorSelectorNilUsesHelmValues=false
Install
1. Install CruiseKube using helm
Install CruiseKube from the OCI registry:
helm install cruisekube oci://tfy.jfrog.io/tfy-helm/cruisekube --namespace cruisekube-system --create-namespace \
  --set cruisekubeController.env.CRUISEKUBE_DEPENDENCIES_INCLUSTER_PROMETHEUSURL="http://prometheus-kube-prometheus-prometheus.monitoring.svc:9090" \
  --set postgresql.enabled=true \
- Pass your own prometheus URL if using an existing installation.
- If you want to use your own postgresql set
postgresql.enabledto false, and pass the value in the global section of values.yaml
Note: You can customize the installation by providing your own
values.yamlfile with specific configurations. See the configuration documentation for available options.
2. Verify Installation
Check that the CruiseKube components are running:
You should see pods like cruisekube-controller-manager-xxx and cruisekube-webhook-server-xxx in the Running state.
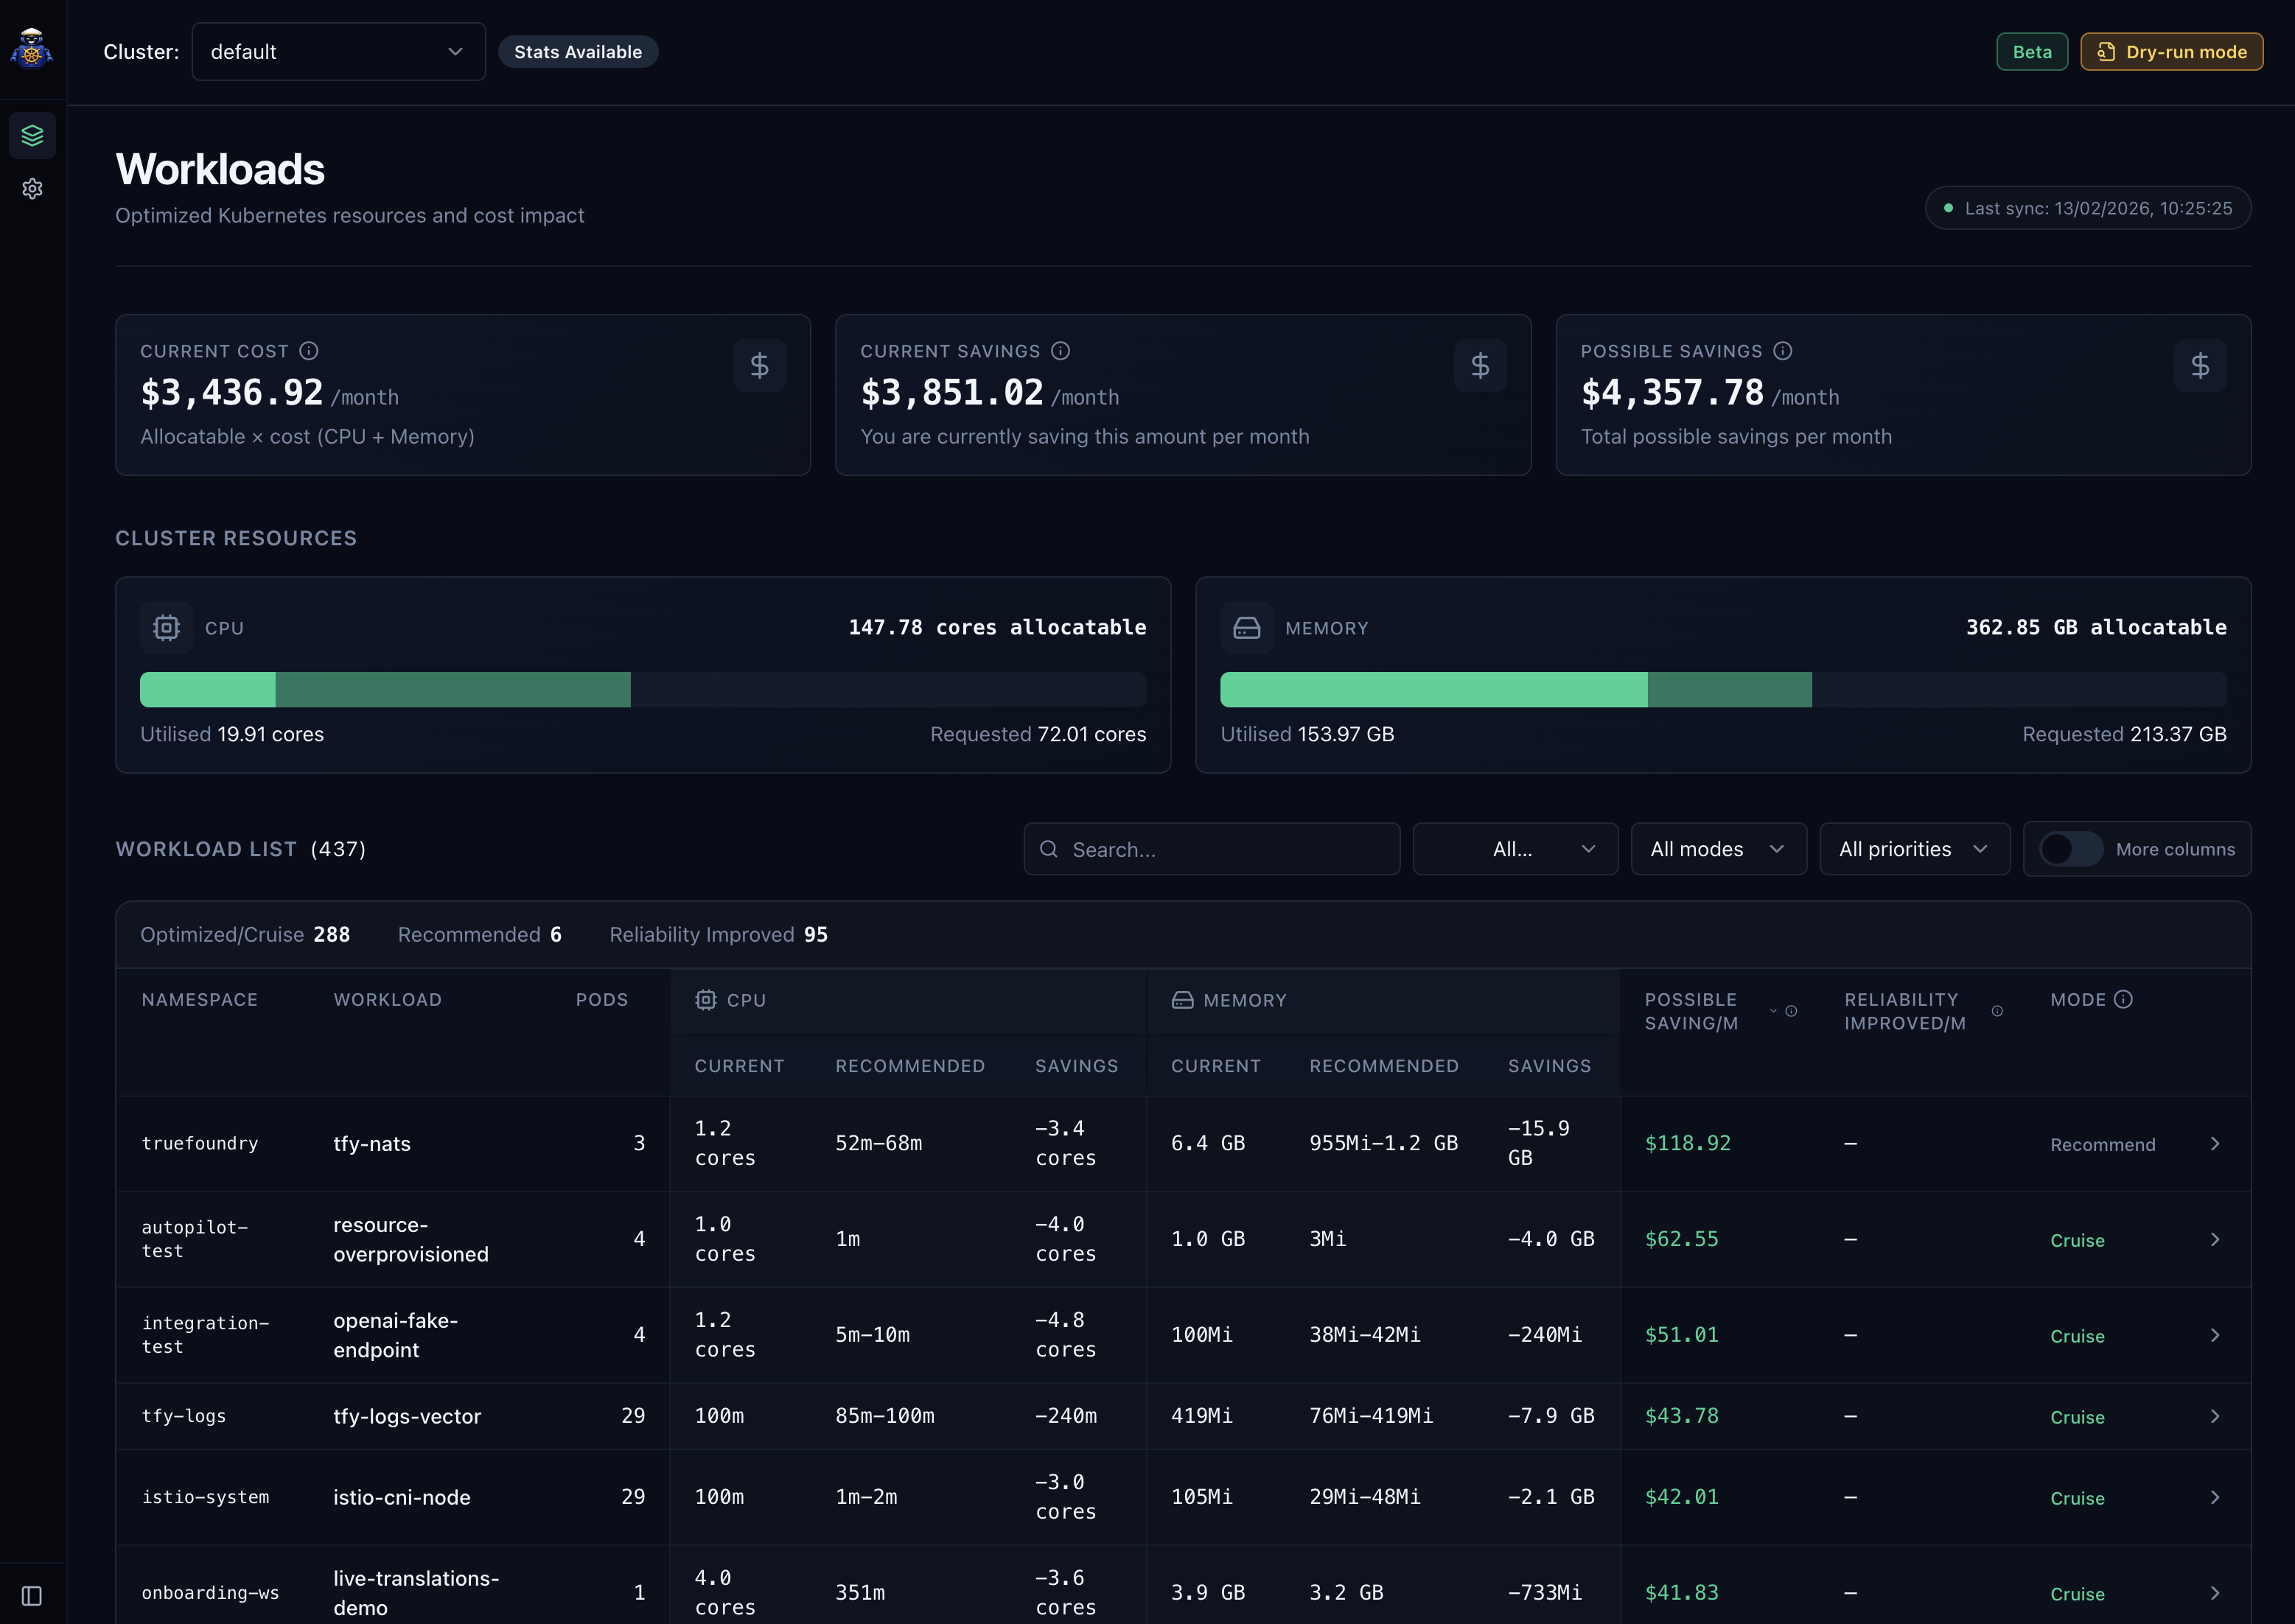
3. View Recommendations
Once the tasks are enabled, you can view the recommendations generated by Port-Forwarding the frontend service.
Open your browser and navigate to http://localhost:3000 to view the recommendations.
Read more about configuration in the Configuration Dashboard section.
4. Apply Recommendations: Disable Dry-Run
By default, dry-run mode is enabled, which means recommendations are generated, but not applied. This is to prevent any unintended optimizations. You will need to manually disable each dry-run based on your requirements. To do this, you will need to pass environment variables in the values file or pass those env variables while upgrading.
Following flags needs to be set false to disable dry-run completely.
- cruisekubeController.env.CRUISEKUBE_RECOMMENDATIONSETTINGS_DISABLEMEMORYAPPLICATION=false
- cruisekubeController.env.CRUISEKUBE_CONTROLLER_TASKS_APPLYRECOMMENDATION_METADATA_DRYRUN=false
- cruisekubeWebhook.env.CRUISEKUBE_RECOMMENDATIONSETTINGS_DISABLEMEMORYAPPLICATION=false
- cruisekubeWebhook.env.CRUISEKUBE_WEBHOOK_DRYRUN=false
helm upgrade --install cruisekube oci://tfy.jfrog.io/tfy-helm/cruisekube --namespace cruisekube-system --create-namespace \
--set cruisekubeController.env.CRUISEKUBE_DEPENDENCIES_INCLUSTER_PROMETHEUSURL="http://prometheus-kube-prometheus-prometheus.monitoring.svc:9090" \
--set postgresql.enabled=true \
--set cruisekubeController.env.CRUISEKUBE_RECOMMENDATIONSETTINGS_DISABLEMEMORYAPPLICATION=false \
--set cruisekubeController.env.CRUISEKUBE_CONTROLLER_TASKS_APPLYRECOMMENDATION_METADATA_DRYRUN=false \
--set cruisekubeWebhook.env.CRUISEKUBE_RECOMMENDATIONSETTINGS_DISABLEMEMORYAPPLICATION=false \
--set cruisekubeWebhook.env.CRUISEKUBE_WEBHOOK_DRYRUN=false
You can check all the available environment variables in the values.yaml file.
Uninstall
To uninstall CruiseKube, run: